How to Make Constellation Cups
Astronomy Project For Kids: How to Make Constellation Cups
We sometimes think that astronomy is a field only for the elders. But we already know about many astronomers and star gazers, who started their journey in astronomy at an early age of life. Here we will describe an amazing astronomy project that you can do with the kids. I assure you that kids will love it.
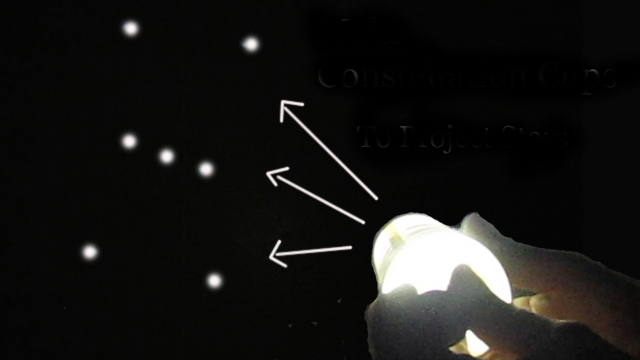
Fig 1: Kids’ Project on making constellation cups
This is a simple and fun project. You can involve the kids while doing it as it needs simple harmless supplies like push pins, small flashlight, paper cups and glue and also the steps are straightforward and easy to understand for a kid. The result will be amazing. Kids will be able to make a paper projector that can shoot images of the constellation onto a white screen or wall.
This is a fun and easy project that kids really like. Using just some simple supplies (push pins, paper cups and a small flashlight) you can make a projector that shoots star and constellation images onto a wall. Here I have given a constellation sheet from which you can cut out the different constellations and make flash cards for the projector.
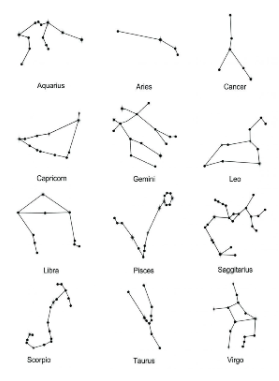
The sheet of constellations for this project is right here (a pdf). Download it and print it up to make your constellation cups.
Fig 1: Constellation sheet
Necessary Project Materials
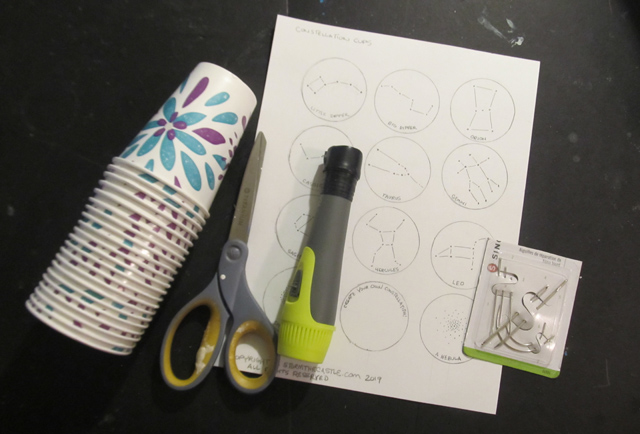
Fig 3: Necessary material for the project of making constellation cups.
You will be able to make this project out of five things easy to collect.
- The constellation cards (You can find them easily in the internet)
- Push pins or a sewing needle
- Paper cups of any size
- One small flashlight
- scissors
Additional optional resource:
To get better results, you can add black or any dark color paint and a paintbrush.
Regarding the flashlight we will suggest you to use the one having only a single LED in it. If you use the flashlight with multiple bulbs, the image on the wall may be obscure. Single bulb will give a more clear view of the constellation on the wall.
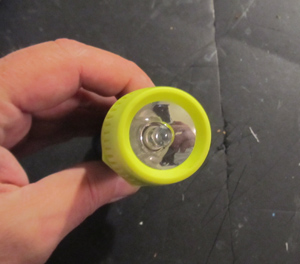
Fig 4: Flashlight with single LED
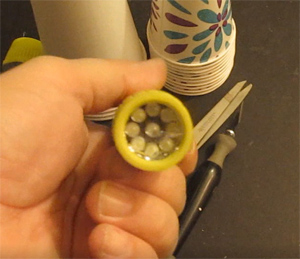
Fig 5: Flashlight with multiple LED
Step by Step Procedure
- Print out the template or sheet of the constellations. But before printing, keep in mind that the size of the constellations will be small enough to fit in a paper cup completely.
- Draw a circle around each constellation, Be careful about the size of the circle. It should fit in the paper cup. If you have different sizes of cups, you can make different sizes of circles around the constellations.
- Cut the circular constellation discs out of the template.
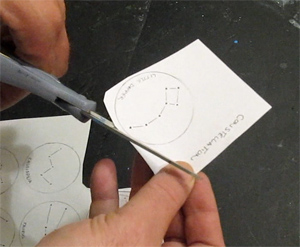
Fig 6: Cutting out the constellation discs from the template
- Put the constellation disk or circle at the base or bottom of the cup. You have to pierce the star holes using a push pin or the swing needle. After that pull out the constellation circle and preserve it for any further use. Take another cup and do the same for the other constellation circles.
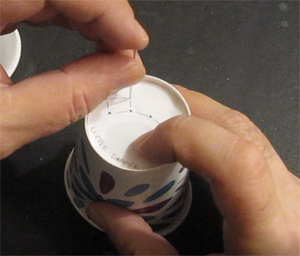
Fig 7: Piercing the star holes
From the top of the cup, you can see the star holes just like this.
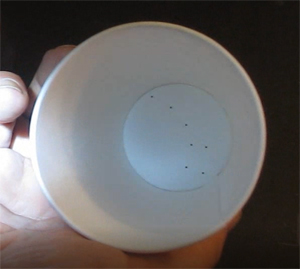
Fig 8: View of constellation inside the cup
- Insert the flash light inside the cup. You can cover the back part with paper or a small piece of fabric. But keep in mind the switch of the flashlight has to be out of the cover as you have to operate it. If you find it difficult to make the back cover, you can leave it. We will get the same output without it too.
- Now switch all the lights off and make the room as dark as possible. The darker the room, the better image you will get on the wall.
- Put the cup at least 2-3 feet away from the wall. You can fix the distance according to the size of your cup and starholes, and the strength of your flashlight.
- Hold the flashlight inside the cup a little ways like the picture, not directly. If you point the light directly to the stars, it will cause light interference which will make the view on the wall fuzzy.
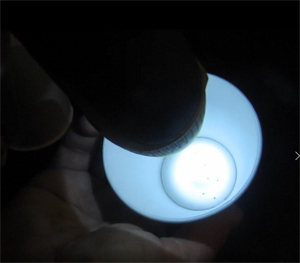
Fig 9: See the fuzzy star holes for putting the beam directly.
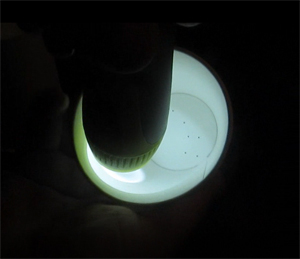
Fig 10: Clear star holes while inserting the flashlight inclined.
Now move the cup and the lights to find out the best image and get the best performance from your little projector.