
Astrophotography: Camera, Telescope, Beginner, Settings
Astrophotography captures astronomical objects and celestial events in space. Photographers use specialized techniques and equipment to image stars, planets, galaxies, and nebulas. Long exposure times, ranging from several seconds to hours, are necessary to capture faint light from distant objects. Tracking mounts compensate for Earth’s rotation, allowing for sharp, clear astrophotography photos. Image stacking and processing software enhance the final results, bringing out details and colors invisible to the naked eye.
DSLR cameras are recommended for astrophotography due to their superior image quality and manual controls. Canon and Nikon offer excellent options, with models like the Canon EOS 6D Mark II and Nikon D850 being well-suited for capturing celestial objects. Key features required for astrophotography include long-exposure capability, high ISO settings, and manual mode. Modified cameras are preferred for serious astrophotographers to increase sensitivity to hydrogen alpha light.
Processing astrophotography images involves several key steps. Astrophotographers open their images in editing software like Adobe Photoshop or StarStax. Levels and curves adjustments enhance brightness, contrast, and color balance. Noise reduction algorithms eliminate noise and hot pixels from images. Image stacking combines multiple exposures to reduce noise and increase signal-to-noise ratio. The final edited image is saved in a lossless format like TIFF or FITS for maximum quality retention.
Astrophotography does not require telescopes for wide-field shots. Wide-field shots capture celestial objects using cameras with wide-angle lenses and tripods. Telescopes enable high-resolution images of smaller, fainter objects. Reflector telescopes excel at deep-space photography, while refractor telescopes perform well for planetary and lunar imaging. Telescope cameras, such as CCD or dedicated astronomical cameras, capture high-resolution images of faint celestial objects.
Astrophotography basics require manual camera settings. ISO should be increased to 1600-3200 to capture faint starlight. Shutter speeds of 20-30 seconds are necessary for long exposures of the night sky. Aperture should be set to the lowest f-stop value, f/2.8 or wider, to let in maximum light. Live view mode is crucial for precise focusing and composition. Dark sky sites away from city lights provide the best views of the night sky.
The best camera settings for astrophotography include Manual mode for full control. Wide apertures of f/2.8 or lower allow more light. Exposure times range from 10 to 30 seconds. ISO settings between 1600 and 3200 increase light sensitivity. Daylight white balance (5600K) renders natural colors of night skies. RAW format preserves maximum image data for post-processing flexibility. Manual focus set to infinity ensures sharp stars.
What is astrophotography?
Astrophotography captures astronomical objects and celestial events in space. Photographers use specialized techniques and equipment to image stars, planets, galaxies, and nebulas. Amateur astrophotographers spend many hours under the night sky, employing long exposures, image stacking, and tracking. Astrophotography serves scientific research and artistic expression, showcasing the universe’s beauty. Challenges include light pollution, atmospheric conditions, and equipment limitations.
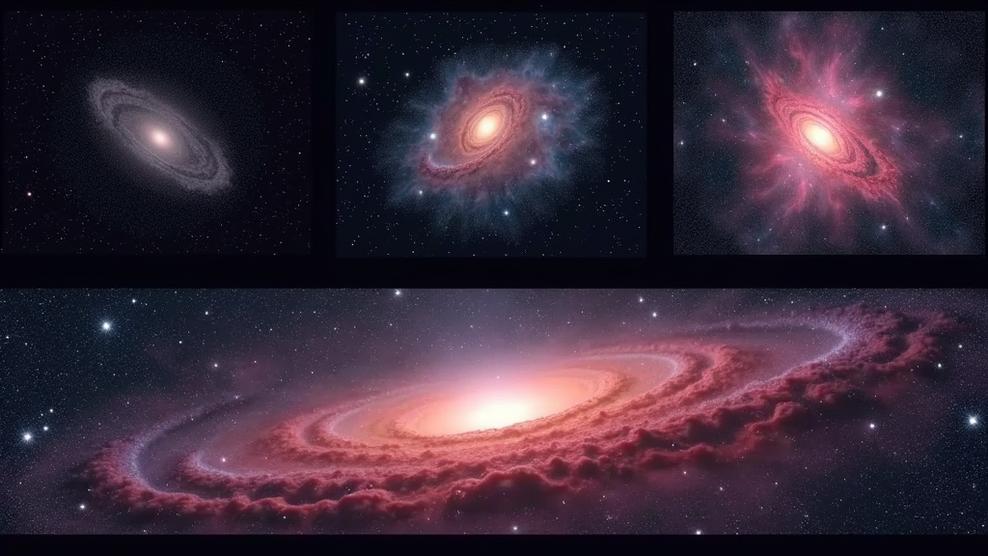
Astrophotography subjects span the entire observable universe. Stars and constellations form the foundation of many astrophotography images, showcasing intricate patterns and celestial arrangements. Planets and moons within our solar system provide detailed close-up views of their surfaces and atmospheric features. Galaxies and nebulae reveal the vast scale and complexity of deep space objects, appearing as colorful clouds or spirals in astrophotography pictures.
Astrophotography technique requires specialized equipment and methods. Long exposure times, ranging from several seconds to hours, are necessary to capture faint light from distant objects. Tracking mounts compensate for Earth’s rotation, allowing for sharp, clear astrophotography photos. Image stacking and processing software enhance the final results, bringing out details and colors invisible to the naked eye.
Astrophotography history dates back to the mid-19th century. The first photograph of the Moon was taken in 1840, marking the beginning of celestial imaging. Technological advancements in cameras, telescopes, and digital processing have revolutionized astrophotography, enabling amateur astronomers to capture professional-quality images from their backyards.
Astrophotography art combines scientific accuracy with aesthetic appeal. Astrophotographers carefully compose their shots, considering framing, color balance, and contrast to create visually striking images. The resulting astrophotography pictures inspire awe and wonder, showcasing the beauty of the cosmos.
Astrophotography contributes to astronomical research and space exploration. High-resolution astrophotography images aid scientists in studying celestial objects and phenomena. Space agencies use astrophotography techniques to capture detailed views of planets, moons, and other cosmic bodies during missions.
Astrophotography serves as a bridge between astronomy and photography. The visual representation of the universe through astrophotography images helps make complex astronomical concepts more accessible to the general public. Astrophotography brings the wonders of the cosmos down to Earth, allowing people to explore and appreciate the vastness of space from their own homes.
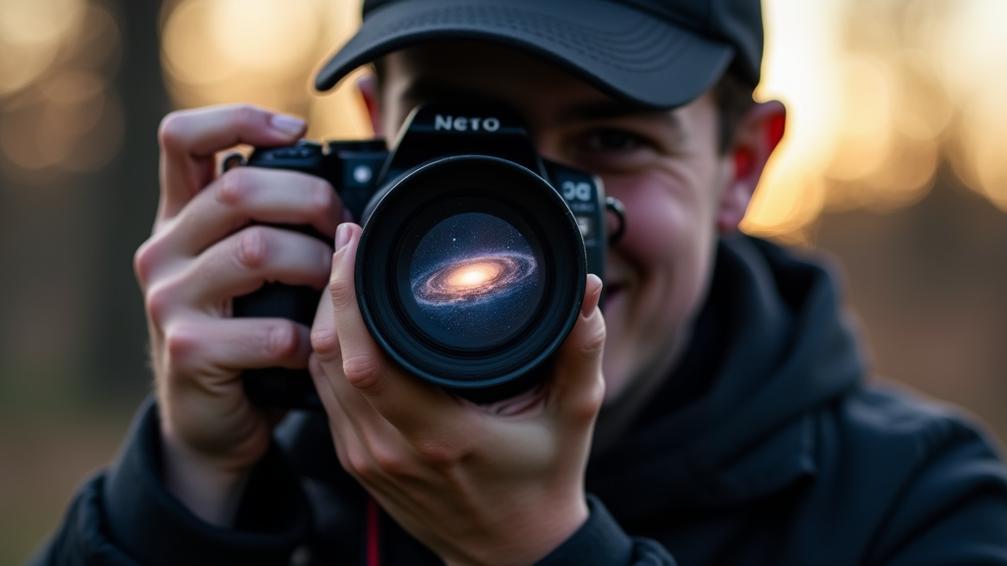
What camera do you need for astrophotography?
DSLR cameras are recommended for astrophotography due to their superior image quality and manual controls. Canon and Nikon offer excellent options, with models like the Canon EOS 6D Mark II and Nikon D850 being well-suited for capturing celestial objects. Used DSLR cameras are sufficient for beginners, provided they have manual mode and RAW format capabilities.
Key features required for astrophotography include long-exposure capability, high ISO settings, and manual mode. Long exposures allow for capturing faint celestial objects, while high ISO settings are necessary for low-light conditions. Manual mode is essential for controlling exposure, aperture, and shutter speed. RAW format support is crucial as it captures more data than JPEG. Cold temperature resistance is important for nighttime shooting, and large battery capacity ensures extended shooting sessions.
Modified cameras are preferred for serious astrophotographers to increase sensitivity to hydrogen alpha light. Short prime lenses between 10-24mm are required for wide-field astrophotography. Equatorial mounts are needed for tracking celestial objects as they move across the sky. Telescopes or lenses with long focal lengths are necessary for certain types of astrophotography.
Is phone camera good for astrophotography?
Google Pixel 9 and 9 Pro excel at astrophotography. Pixel 9 features a 50MP primary sensor with f/1.85 aperture and optical stabilization. Pixel 9 Pro boasts a larger 64MP sensor and telephoto lens. Both phones capture stunning Milky Way images with minimal noise. Phone cameras have limitations but recent smartphones improved astrophotography capabilities.
Phone camera lenses are designed for everyday photography. Wide-angle lenses (24-28mm equivalent) are common in smartphones. Small apertures (f/1.8-f/2.2) limit light gathering ability. Phone camera sensors are smaller than dedicated camera sensors. Smaller sensors reduce light sensitivity and dynamic range. Faint celestial object capture is challenging with phone camera sensors.
Phone camera settings for astrophotography are limited. Exposure adjustment is restricted on most phone cameras. ISO control is limited on smartphone cameras. Focus control is challenging for astrophotography with phone cameras. Phone camera RAW image capture is not always available. Night mode helps with low-light photography but is not always optimized for astrophotography.
Phone camera quality lags behind dedicated cameras for astrophotography. Resolution is lower in phone cameras. Dynamic range is limited in smartphone sensors. Low-light performance is inferior to dedicated cameras. Phone camera noise is significant in low-light conditions. Grainy appearance is common in phone camera astrophotos.
Phone camera autofocus systems struggle with faint celestial objects. Low-light conditions challenge phone camera autofocus. Phone camera shots of celestial objects require multiple exposures. Managing multiple exposures is challenging with phone cameras.
Can I use iPhone 14 for astrophotography?
iPhone 14 excels at astrophotography. Quad-camera setup captures celestial objects beyond the moon. 48MP main camera produces high-quality night sky images. Night mode enhances low-light photography. A16 Bionic chip improves image processing. iPhone 14 photographs moon, planets, stars, and constellations. Tripods and external lenses further enhance astrophotography capabilities.
iPhone 14 light sensitivity has been improved for better low-light performance. The main camera sensor measures 1/1.7 inches with an f/1.78 aperture, capturing more light in dark conditions. The “Photonic Engine” enhances low-light performance by up to 2x, resulting in clearer and brighter astrophotography shots.
iPhone 14 hardware is powered by the A16 Bionic chip, enabling fast processing and efficient battery life for extended shooting sessions. Computational photography features like Deep Fusion and Smart HDR produce well-exposed images of celestial objects. The quad-camera setup includes two 12MP telephoto lenses, offering 2x optical zoom for closer views of celestial bodies.
iPhone 14 performance in astrophotography is strong for a smartphone but has limitations. The camera handles exposures up to 30 seconds and has a maximum ISO of 3200, suitable for capturing stars and the Milky Way. Bright planets like Jupiter appear in 12MP resolution, while the Moon can be photographed with impressive detail. The small sensor size and limited manual controls restrict performance compared to dedicated astrophotography equipment.
iPhone 14 rumors suggested an “Astrophotography mode,” but this feature was not officially announced. The improved hardware and software benefit astrophotography enthusiasts despite the absence of a dedicated mode. Third-party apps like SkySafari, Star Walk, and ProCam optimize iPhone 14 astrophotography settings, enhancing its capabilities.
Can I use iPhone 15 for astrophotography?
The iPhone 15 is a capable tool for astrophotography enthusiasts. iPhone 15 features advanced camera capabilities specifically designed for low-light and night sky photography. iPhone 15 camera boasts a 48MP main sensor with larger pixels, enhancing its ability to capture faint celestial objects. Night mode on the iPhone 15 allows for exposure times up to 30 seconds, ideal for capturing star trails and the Milky Way.
iPhone 15 photography performance is enhanced by its quad-camera setup, including wide-angle, telephoto, ultra-wide, and time-of-flight lenses. ProRAW format support enables greater editing flexibility, preserving more detail in astrophotography shots. Manual controls for ISO, shutter speed, and focus give users precise control over their night sky images. iPhone 15 camera’s f/1.6 aperture and 26mm focal length contribute to improved low-light performance.
iPhone 15 performance in astrophotography is bolstered by its A15 Bionic chip, enabling faster image processing. Optical image stabilization (OIS) reduces camera shake, resulting in sharper star images. iPhone 15 night performance excels with its improved sensor size and advanced noise reduction algorithms. Light sensitivity extends to ISO 3200, allowing for brighter captures of dim celestial objects.
Astrophotographers using the iPhone 15 will benefit from accessories like tripods for stability during long exposures. Light pollution remains a challenge, necessitating dark sky locations for optimal results. iPhone 15 is limited in capturing very faint deep sky objects compared to dedicated astrophotography cameras. Battery life considerations are important for extended shooting sessions under dark skies.
Is mirrorless camera good for astrophotography?
Mirrorless cameras are excellent for astrophotography. Mirrorless camera systems offer compact and lightweight designs, ideal for portable setups. Electronic viewfinders provide real-time image previews, enhancing framing and composition in low-light conditions.
Mirrorless camera sensors deliver high-quality results in astrophotography. Advanced sensors offer improved low-light performance, capturing faint celestial objects with clarity. Reduced noise in long exposures results in cleaner images of deep-sky targets.
Mirrorless camera features enhance astrophotography capabilities. Advanced autofocus systems accurately lock onto stars and planets. In-body image stabilization minimizes blur during long exposures. Silent shooting modes eliminate vibrations, ensuring sharp images of celestial bodies.
Mirrorless camera settings allow precise control over astrophotography exposures. Manual control options enable fine-tuning of aperture, shutter speed, and ISO for optimal results. Live histograms and exposure previews assist in achieving correct exposures for challenging night sky scenes.
Mirrorless camera performance excels in low-light conditions. High ISO capabilities, reaching 25600 or higher, capture faint celestial objects. Improved dynamic range preserves details in both bright stars and dark nebulae within a single frame.
Is DSLR camera good for astrophotography?
DSLR cameras excel in astrophotography. Astrophotographers choose DSLRs for affordability and ease of use. DSLRs capture impressive nightscapes and celestial objects. Wide-field, planetary, and deep-sky photography are achievable with DSLRs. Proper technique and post-processing overcome DSLR limitations like noise and dynamic range. DSLRs remain popular for astrophotography enthusiasts, especially beginners exploring the field.
DSLR camera lenses provide a wide range of options for astrophotography. Wide-angle lenses capture expansive night sky scenes. Telephoto lenses allow detailed shots of celestial objects. Prime lenses with wide apertures (f/2.8 or wider) excel in low-light conditions.
DSLR camera settings require optimization for astrophotography. Manual mode enables full control over exposure and focus. ISO settings between 800-3200 balance light sensitivity and noise. Shutter speeds of 15-30 seconds capture faint stars and nebulae. Apertures of f/2.8-f/4 allow sufficient light while maintaining sharpness.
DSLR camera sensors play a crucial role in astrophotography performance. Full-frame sensors offer superior light-gathering capabilities. APS-C sensors provide a good balance of performance and affordability. High-resolution sensors capture fine details in celestial objects.
DSLR camera image quality depends on several factors. Proper exposure techniques minimize noise in long exposures. Dark frame subtraction reduces hot pixels and thermal noise. Stacking multiple exposures enhances signal-to-noise ratio.
DSLR camera autofocus struggles in low-light conditions. Manual focus using live view mode ensures sharp star images. Focus peaking and magnification assist in precise focusing. Infinity focus marks on lenses serve as starting points for adjustment.
DSLR camera exposure requires careful consideration in astrophotography. Exposure times vary based on focal length and desired star trailing effects. The “500 rule” (500 divided by focal length) estimates maximum exposure time for sharp stars. Bracketing exposures helps capture optimal dynamic range.
How to process astrophotography images?
To process astrophotography images, follow the steps listed below.
- Open images in editing software like Adobe Photoshop or StarStax
- Use the “Crop” tool to remove unwanted elements and focus on the main celestial object
- Adjust levels and curves to enhance brightness, contrast, and color balance
- Apply noise reduction algorithms to eliminate noise and hot pixels
- Convert images to 16-bit or 32-bit mode for more precise adjustments
- Utilize software tools for streamlined editing by clicking on necessary functions
- Employ batch processing to upload and edit multiple images simultaneously
- Save different versions during processing to preserve the original image and allow experimentation
- Apply the “Unsharp Mask” filter to enhance image details through sharpening, ranging from 0.5-2.0 pixels
- Adjust color temperature between 3500-6500K to optimize the desired color balance for different celestial objects
- Use image stacking to combine multiple exposures, reducing noise and increasing signal-to-noise ratio
- Apply flat fielding to correct for vignetting and uneven illumination
- Perform dark frame subtraction to remove thermal noise and hot pixels
- Use deconvolution algorithms to reduce atmospheric distortion effects
- Save the final edited image in a lossless format like TIFF or FITS for maximum quality retention
Processing astrophotography images requires several key steps. Astrophotographers open their images in editing software like Adobe Photoshop or StarStax. The “Crop” tool removes unwanted elements and focuses on the main celestial object. Levels and curves adjustments enhance brightness, contrast, and color balance. Noise reduction algorithms eliminate noise and hot pixels from images. Conversion to 16-bit or 32-bit mode allows for more precise adjustments.
Software tools streamline the editing process. Astrophotographers click on necessary editing functions within their chosen software. Batch processing enables uploading and editing multiple images simultaneously. Saving different versions during processing preserves the original image and allows for experimentation. The “Unsharp Mask” filter enhances image details through sharpening, ranging from 0.5-2.0 pixels. Color temperature adjustments between 3500-6500K optimize the desired color balance for different celestial objects.
Specialized techniques further refine astrophotography images. Image stacking combines multiple exposures to reduce noise and increase signal-to-noise ratio. Flat fielding corrects for vignetting and uneven illumination. Dark frame subtraction removes thermal noise and hot pixels. Deconvolution algorithms reduce atmospheric distortion effects. The final edited image is saved in a lossless format like TIFF or FITS for maximum quality retention.
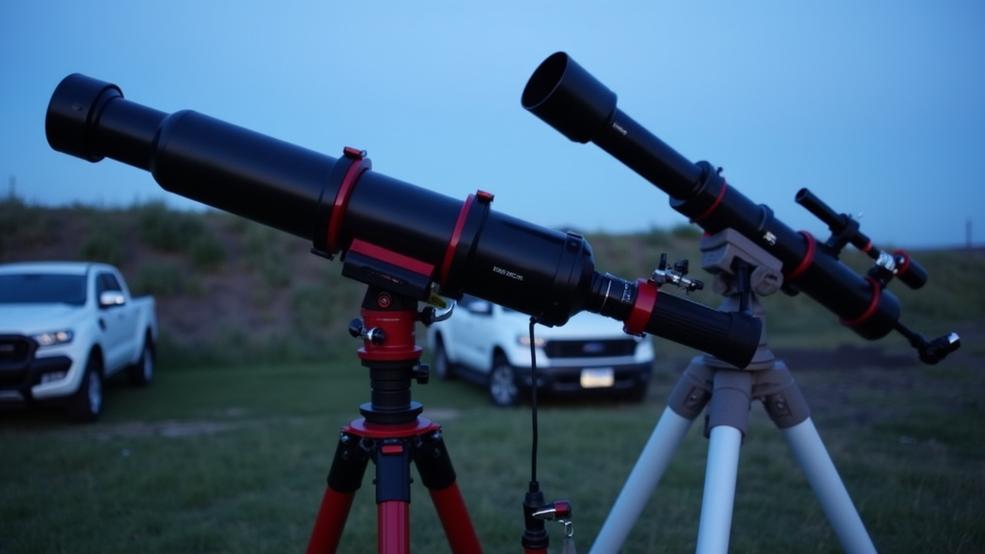
Do you need a telescope for astrophotography?
Astrophotography does not need telescopes. Wide-field shots capture celestial objects using cameras with wide-angle lenses and tripods. However, telescopes enable high-resolution images of smaller, fainter objects. Telescopes enhance astrophotography experiences and results, especially for detailed images of planets, lunar features, and deep-sky objects.
Alternative equipment for astrophotography includes specialized camera lenses and accessories. A telescope lens with a focal length of 300mm or more provides sufficient magnification for many celestial objects. Manual mode settings on DSLR cameras allow full control over exposure, ISO, and aperture for optimal results. Essential accessories like tripods and remote shutter releases minimize camera shake during long exposures.
Telescopes offer significant advantages for advanced astrophotography. Reflector telescopes excel at deep-space photography, while refractor telescopes perform well for planetary and lunar imaging. Telescope setups involve precise optical alignment and specialized equipment. Telescope cameras, such as CCD or dedicated astronomical cameras, capture high-resolution images of faint celestial objects. Telescope mounts track celestial object motion, enabling longer exposures for improved detail and clarity.
Specialized telescope gear enhances astrophotography results. Focal reducers decrease telescope focal lengths, widening the field of view. Autoguiders maintain precise focus during long exposures, ensuring sharp images. Telescope accessories like filters and adapters optimize image quality and versatility. Astrographs, designed specifically for astrophotography, provide superior optical performance for capturing detailed celestial images.
What is the best telescope for astrophotography?
Telescopes for astrophotography balance quality optics, mechanical stability, and affordability. Refractors, Newtonians, and computerized models are top choices for astrophotographers. Focal length, optics quality, mechanicals quality, imaging capabilities, setup ease, and price range are crucial factors in selecting the best telescope.
Refractors excel in astrophotography, for planetary and lunar imaging. The William Optics RedCat 51 is a compact, high-quality refractor ideal for wide-field astrophotography. Newtonians offer large apertures and low cost, making them popular among astrophotographers. Sky-Watcher telescopes provide high-quality Newtonian reflectors with large apertures for deep-space imaging.
Computerized telescopes feature Go-To functionality and precise object tracking. Celestron models, such as Schmidt-Cassegrain telescopes, are excellent options for astrophotography. Smart telescopes offer advanced features like Wi-Fi connectivity and automatic image capture, enhancing the imaging experience.
Beginners will find suitable options in astrophotography telescopes like the Celestron NexStar 130SLT and Sky-Watcher EvoStar 102. Advanced astrophotographers opt for high-end models such as the Celestron EdgeHD 1400 or Takahashi FS-152. Telescopes with large apertures and long focal lengths are ideal for capturing deep-space objects.
What is a good telescope focal length for astrophotography?
Focal lengths between 500mm and 1000mm are optimal for astrophotography. Fast focal ratios enable shorter exposure times and wider fields of view. Higher focal ratios provide increased magnification for planetary and lunar photography. Focal length selection depends on target objects and camera specifications. Wide-field astrophotography benefits from shorter focal lengths around 500mm. Deep-space object photography utilizes 800-1200mm focal lengths.
Deep sky objects like nebulae and galaxies are best captured with focal lengths between 500-1000mm. Kitchin (2013) recommends this range for general deep sky astrophotography. Planetary photography demands much longer focal lengths. Parker (2018) suggests using a 4000mm focal length for high-resolution planetary images. Advanced planetary imaging requires even longer focal lengths. Mobberley (2019) states that focal lengths of 6000mm or more are necessary for detailed planetary shots.
Lunar photography benefits from a moderate focal length. Dyer (2017) recommends a 1000mm focal length for lunar imaging to balance resolution and field of view. Landscape astrophotography requires much shorter focal lengths. Kingslake (2017) advises using a 14-24mm focal length range to capture the night sky with terrestrial features.
Equipment specifications influence the choice of focal length. Ratledge (2017) suggests using a 1200mm focal length for telescopes with 2″ field stops. For telescopes with 1.25″ field stops, an 800mm focal length is recommended. Wide field views with full frame cameras are best achieved with a 14mm focal length, as advised by Warner (2015).
What telescope aperture is best for astrophotography?
Experts consider 8 inches (203 mm) or larger apertures best for astrophotography. Larger apertures collect more light, producing brighter, higher-resolution images. Deep-sky objects require 80-150mm aperture telescopes. Planetary imaging needs 150-250mm aperture telescopes. Larger apertures increase weight, cost, and complexity of telescopes.
Deep-sky objects demand different aperture sizes. Globular cluster imaging requires a minimum aperture of 5 inches (125 mm) to capture faint stars. Wide-field imaging of nebulae, star fields, and galaxies is achievable with 50-80 mm apochromatic triplet refractors. These refractors offer high-quality images with minimal chromatic aberration.
Beginner telescopes start with a minimum aperture of 2.8 inches (70 mm). This size balances cost, portability, and image quality for newcomers. The upper range for beginner telescopes extends to 10 inches (254 mm). Larger apertures provide improved light-gathering capability and resolution for more serious beginners.
Larger apertures yield better results in astrophotography. Increased light-gathering ability and resolution enhance image quality for various celestial objects. Smaller apertures produce excellent images with proper telescope design and optical quality. The ideal aperture ultimately depends on the specific astrophotography goals and budget constraints.
What are the basics of astrophotography for beginners?
The basics of astrophotography for beginners are outlined below.
- Switch to manual mode on the camera for full control over settings.
- Adjust ISO to 1600-3200 to capture faint starlight.
- Set shutter speeds to 20-30 seconds for long exposures of the night sky.
- Use the lowest f-stop value (f/2.8 or wider) for aperture to let in maximum light.
- Utilize live view mode for precise focusing and composition.
- Zoom in on a bright star or planet in live view to achieve sharp focus.
- Use a sturdy tripod and remote shutter release for long-exposure photography.
- Monitor exposure and ISO settings using the camera’s histogram and exposure meter.
- Balance high ISOs to manage noise and maintain image quality.
- Choose wide-angle lenses with focal lengths between 10-24mm for expansive star fields.
- Select fast lenses with wide apertures (f/2.8 or wider) for better light capture.
- Find dark sky sites away from city lights for optimal night sky views.
- Use resources like Dark Site Finder to locate areas with minimal light pollution.
- Focus on the southern horizon for photographing the Milky Way.
- Experiment with ISO, shutter speed, and aperture for capturing the Milky Way.
- Use post-processing software like Adobe Lightroom or Photoshop to enhance raw images.
- Apply noise reduction techniques and image stacking to improve image quality.
- Bring out details and colors in celestial objects through careful processing.
Astrophotography basics require manual camera settings. Beginners switch to manual mode, adjusting aperture, shutter speed, and ISO. Wide-angle lenses with fast apertures are suitable. Photographers pick dark locations with minimal light pollution. Focus is set to infinity. Tripods stabilize cameras. Remote shutter releases prevent camera shake. RAW format captures more image data. Noise reduction software enhances image quality.
Camera settings require careful adjustment for optimal results. ISO should be increased to 1600-3200 to capture faint starlight. Shutter speeds of 20-30 seconds are necessary for long exposures of the night sky. Aperture should be set to the lowest f-stop value, f/2.8 or wider, to let in maximum light.
Live view mode is crucial for precise focusing and composition. Photographers should zoom in on a bright star or planet in live view to achieve sharp focus. Proper focus ensures crisp, detailed images of stars and celestial objects.
Long-exposure photography is fundamental to astrophotography. Exposure times of 20-30 seconds or more are required to capture enough light from distant stars and galaxies. Photographers must use a sturdy tripod and remote shutter release to prevent camera shake during long exposures.
Exposure and ISO settings need constant monitoring. The camera’s histogram and exposure meter help check for proper exposure in the dark conditions. High ISOs introduce noise, requiring careful balance between light sensitivity and image quality.
Lens selection greatly impacts astrophotography results. Wide-angle lenses with focal lengths between 10-24mm are ideal for capturing expansive star fields and the Milky Way. Fast lenses with wide apertures (f/2.8 or wider) allow more light to reach the camera sensor.
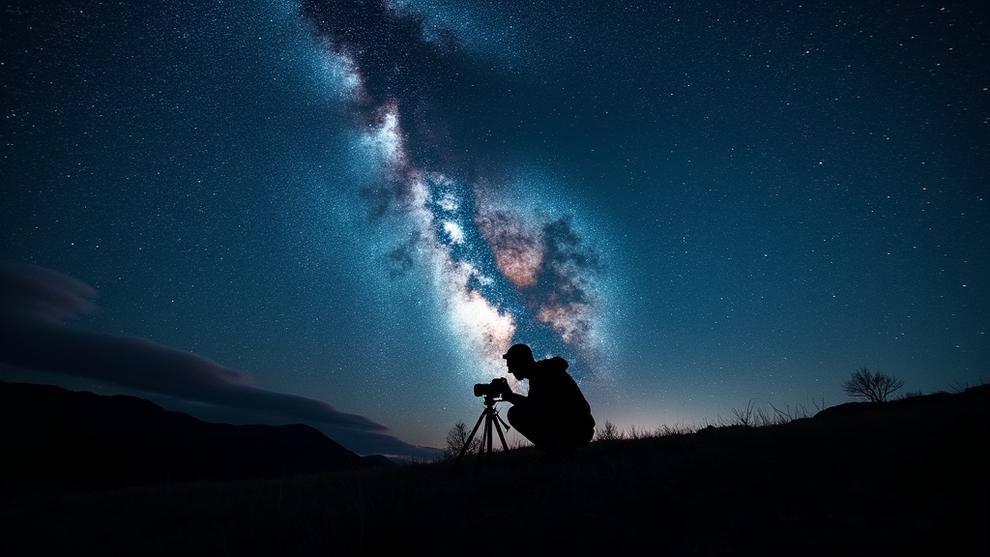
Location is critical for successful astrophotography. Dark sky sites away from city lights provide the best views of the night sky. Online resources like Dark Site Finder help locate suitable areas with minimal light pollution. Southern horizon views are advantageous for photographing the Milky Way.
How to get started in astrophotography?
To get started in astrophotography, follow the steps listed below.
- Choose a camera with manual controls and RAW format capability
- Choose sturdy tripod to support equipment weight and prevent camera shake
- Use lenses or telescopes with focal lengths of at least 200mm for detailed celestial objects
- Adjust camera settings based on the celestial object
- Set camera focus to infinity and use live view or focus peaking for fine-tuning
- Use manual mode for better control over exposure settings
- Use remote shutter release to prevent camera shake during long exposures
- Shoot in RAW format for greater flexibility in post-processing
- Check weather forecasts and moon phases for clear skies and new moons
- Avoid light pollution by traveling to dark locations with minimal artificial lighting
- Use a focal length of at least 200mm and high ISO (1600-3200) for detailed images of specific celestial targets
Astrophotography beginners must choose the right equipment to capture stunning night sky images. A camera with manual controls and RAW format capability is essential, as recommended by Kitchin (2013). Sturdy tripods support the weight of astrophotography equipment, preventing camera shake during long exposures. Lenses or telescopes with focal lengths of at least 200mm are necessary for capturing detailed celestial objects.
Mastering essential techniques is crucial for successful astrophotography. Camera settings vary depending on the type of celestial object being photographed. Wide-field imaging uses low ISO (100-400) and wide aperture (f/2.8-f/4), while deep-sky imaging requires higher ISO (800-1600) and narrower aperture (f/5.6-f/8), according to Warner (2017). Focusing on celestial objects is achieved by setting the camera’s focus to infinity and using live view or focus peaking features for fine-tuning. Manual mode provides better control over exposure settings in astrophotography. Remote shutter release prevents camera shake during long exposures. RAW format offers greater flexibility for post-processing astrophotography images.
Preparation is key for successful astrophotography shoots. Weather forecasts and moon phases must be checked before capturing images, as clear skies and new moons provide ideal conditions. Light pollution avoidance requires traveling to dark locations with minimal artificial lighting, as suggested by Cinzano (2001). Zooming in on specific celestial targets requires a focal length of at least 200mm and high ISO (1600-3200) for capturing detailed images of planets, stars, or galaxies.
How to focus the camera for astrophotography?
To focus the camera for astrophotography, follow the steps listed below.
- Use manual focus for precise control and to prevent autofocus hunting in low-light conditions.
- Enable live view mode to see a real-time digital image on the LCD screen for accurate focusing.
- Locate a bright star or planet in the frame to serve as an ideal focus target.
- Magnify the live view image 5-10x to enhance focusing accuracy and clearly see star details.
- Turn the focus ring slowly while observing the magnified star on the LCD screen for precise focus adjustment.
- Enable focus peaking, if available, to highlight in-focus areas with colored outlines for visual confirmation.
- Use a Bahtinov mask in front of the lens or telescope to create diffraction spikes for precise focus.
- Preset the lens to the infinity focus mark as a starting point before fine-tuning the focus.
- Aim at far-away terrestrial objects to set approximate focus in preparation for night shooting.
- Frame the intended deep-sky object and make subtle focus refinements as needed for final focus adjustments.
Camera focusing for astrophotography requires manual adjustment. Live view mode enables 5x-10x magnification on bright stars or the moon. Lens focus ring is rotated until celestial objects appear sharp. Bahtinov mask creates diffraction patterns for precise focusing. Infinity focus setting with slight inward adjustment finds optimal focus point. Sturdy tripod prevents camera shake.
Live view mode is essential for accurate focusing. Photographers enable live view on their cameras to see a real-time digital image on the LCD screen. A bright star or planet serves as an ideal focus target. Photographers locate a prominent celestial object in the frame for focusing.
Image magnification enhances focusing accuracy. Photographers magnify the live view image 5-10x to clearly see star details. Focus adjustment requires patience and precision. Photographers turn the focus ring slowly while observing the magnified star on the LCD screen.
Focus peaking highlights in-focus areas with colored outlines. Photographers enable focus peaking if their camera offers this feature. It provides visual confirmation of sharp focus on stars.
Bahtinov masks create diffraction spikes for precise focus. Photographers insert a Bahtinov mask in front of the lens or telescope to achieve critical focus. Preset infinity focus marks serve as a starting point. Photographers preset their lens to the infinity focus mark before fine-tuning.
What lens should you use for astrophotography?
Wide-angle lenses with 10-24mm focal length and f/2.8 or lower aperture excel in astrophotography. Canon RF 15-35mm f/2.8L IS USM offers superb performance. Nikon 14-24mm f/2.8G ED presents a fantastic option. Pretty much any lens meeting these specifications works well. 50mm lenses provide narrower field of view but remain usable.
Photographers use ultra-wide lenses like 12-24mm or 15-35mm lenses for capturing more sky. Ultra-wide lenses provide an extremely wide field of view but exhibit more distortion. Photographers use 24-70mm lenses as a versatile option for astrophotography. 24-70mm lenses pair well with cameras having good low-light performance. Photographers use 50mm lenses for astrophotography, though they capture less sky than wider lenses. Photographers use 70-300mm lenses for capturing specific celestial objects like the moon or planets.
Astrophotographers consider aperture when choosing lenses. Wide aperture lenses (f/2.8 or wider) capture enough light in low-light conditions. Astrophotographers consider focal length when selecting lenses. Shorter focal lengths (14mm or 24mm) capture the vastness of the night sky better. Astrophotographers check focusing performance of lenses. Lenses must focus accurately in low-light conditions for astrophotography. Astrophotographers consider lens sharpness for capturing detailed star images. Astrophotographers consider lens quality for minimal distortion and chromatic aberration. Astrophotographers consider budget when choosing lenses. Astrophotography lenses are expensive, requiring careful budgeting.
What is the best astrophotography tripod?
The Vanguard Alta Pro 263AB 100 Aluminum Tripod stands out as the best astrophotography tripod. Vanguard Alta Pro 263AB 100 offers a load capacity of 15.4 lbs (7 kg), supporting most astrophotography setups. The tripod provides excellent stability with its multi-angle central column and wide stance legs. Vanguard Alta Pro 263AB 100 weighs 5.38 lbs (2.44 kg), balancing portability and sturdiness. The tripod is priced around $200, offering great value for its features and performance.
Vanguard Alta Pro 263AB 100 features an adjustable height range of 28.125 inches (71.4 cm) to 68.125 inches (173 cm). The tripod’s aluminum construction ensures durability and corrosion resistance at a lower cost than carbon fiber alternatives. Vanguard Alta Pro 263AB 100 uses a secure flip-lock leg locking mechanism for quick setup and stability in various conditions. The tripod comes with a high-quality SBH-100 ball head, allowing smooth and precise movements for astrophotography.
Vanguard Alta Pro 263AB 100 is compatible with most star trackers, including popular models from Sky-Watcher and Celestron. The tripod’s robust build quality and Vanguard’s reputation for reliability make it a durable investment for astrophotographers. Vanguard Alta Pro 263AB 100 serves multiple photography genres, extending its usefulness beyond astrophotography to landscape, wildlife, and macro photography.
What are the best apps for astrophotography?
The best apps for astrophotography are listed below.
- Sky Mapping Apps: Stellarium, SkySafari, Celestron SkyPortal
- Weather and Conditions Apps: Astrospheric, Clear Outside, Light Pollution Map
- Camera and Imaging Apps: NightCap Camera (iOS), HD Camera Pro (Android), Deep Sky Camera (Android)
- Specialized Astrophotography Tools: PolarFinder Pro, Polar Scope Align Pro, PhotoPills, DSO Planner Pro
- Object Tracking and Forecasting Apps: ISS Detector, Heavens-Above, My Aurora Forecast
- Dark Adaptation Apps: DarkLight (iOS), NightShift- Stargazing and Astronomy
Astrophotography apps enhance the stargazing experience and improve image capture. Sky mapping apps like Stellarium, SkySafari, and Celestron SkyPortal provide real-time simulations of the night sky. Weather and conditions apps such as Astrospheric, Clear Outside, and Light Pollution Map help photographers plan their shoots effectively.
Camera and imaging apps are essential for capturing celestial objects. NightCap Camera enables low-light photography on iOS devices. HD Camera Pro offers manual controls for Android users. Deep Sky Camera specializes in deep-sky astrophotography on Android platforms.
Specialized astrophotography tools streamline the imaging process. PolarFinder Pro and Polar Scope Align Pro assist with polar alignment for equatorial mounts. PhotoPills provides comprehensive planning and capturing features for celestial objects. DSO Planner Pro helps users locate deep-sky objects efficiently.
Object tracking and forecasting apps add value to astrophotography sessions. ISS Detector tracks International Space Station visibility. Heavens-Above monitors satellites and celestial objects. My Aurora Forecast provides aurora alerts and viewing tips.
Dark adaptation is crucial for astrophotography. DarkLight helps iOS users find dark locations for optimal shooting conditions. NightShift: Stargazing and Astronomy offers stargazing guides to enhance the overall experience.
When is the best time for astrophotography?
September and May offer optimal astrophotography conditions. New moon phases create darker skies, enhancing celestial visibility. Cloudless nights with dry, steady air provide ideal settings. Dusk and dawn present the best timing for capturing celestial objects. Winter months (December-February) excel for Orion Nebula photography. Summer (June-August) offers prime Milky Way visibility.
Lunar cycle considerations are crucial for optimal astrophotography. Photographers plan shoots around the new moon phase to minimize moonlight interference. Full moon and gibbous moon phases are avoided for star photography. Longer shutter speeds of 15-30 seconds are used to capture starlight during dark moon phases. Shutter speeds for star trails range from 30 seconds to several minutes.
Seasonal factors affect astrophotography opportunities. Northern Hemisphere experiences prime conditions from May to September. Southern Hemisphere offers ideal conditions from November to March. Summer months provide optimal conditions for capturing the Milky Way’s galactic core. Winter offers good opportunities with longer nights, despite cold temperature challenges.
Technical aspects play a significant role in astrophotography. Star trail capture requires 20-30 second shutter speeds. Milky Way capture utilizes 10-20 second shutter speeds with wide-angle lenses (10-24mm). Low ISO settings minimize noise in astrophotography. Infinity focus ensures sharp star images. RAW format captures more image data for post-processing.
Environmental factors impact astrophotography quality. Clear, dry weather with low humidity enhances conditions. High pressure weather systems improve astrophotography conditions. Light pollution reduces star visibility. Photographers seek locations with minimal artificial lighting. Light pollution filters reduce stray light impact. Sky charts, planetarium software, and apps like SkySafari and Stellarium assist in planning astrophotography sessions.
What is the best weather for astrophotography?
Ideal conditions for astrophotography include stable temperatures between -10°C to 10°C. Little wind below 10 km/h ensures sharp images. Arid regions offer better transparency. High-altitude locations above 2,000 meters have thinner atmosphere, improving viewing conditions. Clear skies allow unobstructed views of celestial objects. Low humidity reduces light scattering and distortion.
Arid climates or dry seasons offer ideal conditions for astrophotography. High altitude locations above 2,000 meters provide clearer views with less atmospheric interference. Areas with no light pollution enhance visibility of faint objects. Low surface heat improves overall image quality. New moon phases are preferred for deep-sky astrophotography. Crescent or gibbous moon phases can be used for lunar and planetary imaging.
Midnight imaging between 22:00 and 02:00 offers optimal conditions. Dawn imaging between 04:00 and 06:00 is suitable for winter astrophotography. Winter months provide better transparency for imaging. Weather forecasts help astrophotographers plan imaging sessions. Weather models predict atmospheric conditions for optimal results. Weather reports provide current data for informed decision-making. Weather tools assist in maximizing the chances of capturing stunning images.
Can you make money with astrophotography?
Astrophotography offers various income opportunities for skilled photographers. Astrophotographers sell prints online and at art shows, with prices ranging from $20 to $500 per print. Creating and selling astrophotography tutorials generates additional revenue, priced between $20 and $200. Workshops provide a lucrative income stream, with fees ranging from $500 to $2,000 per session.
Astrophotography products expand revenue potential. Photographers sell calendars, mugs, and other merchandise featuring their celestial images. Stock photography websites allow astrophotographers to earn royalties, with licensing fees ranging from $50 to $500 per image. Astrophotography magazines and publications pay $50 to $500 for featured images.
Building a successful astrophotography business requires market understanding. The astrophotography market is projected to reach $2.5 billion by 2025, according to ResearchAndMarkets.com. Identifying opportunities involves networking with astronomy clubs and partnering with science organizations. Effective sales strategies include developing a strong online presence and tailoring products to customer demands.
Astrophotographers diversify income sources to maximize earnings. Combining print sales, tutorials, workshops, and stock photography creates a robust business model. Annual earnings from astrophotography range from $5,000 to $50,000 for dedicated professionals. Specializing in deep-space or planetary photography helps target specific customer segments, including astronomy enthusiasts, educators, and advertising agencies.
What are the best camera settings for astrophotography?
The best camera settings for astrophotography are listed below.
- Use Manual mode for full control over camera settings.
- Opt for wide apertures of f/2.8 or lower to allow more light.
- Set exposure times between 10 to 30 seconds for gathering light.
- Apply the “500 rule” to determine maximum exposure time and prevent star trails.
- Choose ISO settings between 1600 and 3200 for increased light sensitivity.
- Set white balance to Daylight (5600K) for natural night sky colors.
- Shoot in RAW format to preserve maximum image data for post-processing.
- Enable long exposure noise reduction to improve image quality.
- Use manual focus set to infinity for sharp stars.
- Prefer wide-angle lenses in the 14-24mm range for capturing vast night skies.
- Disable image stabilization when using a tripod to prevent vibrations.
- Apply exposure compensation of +1 or +2 stops to prevent underexposure of stars.
Manual mode is essential for astrophotography. It provides full control over camera settings. Wide apertures of f/2.8 or lower are ideal for astrophotography. They allow more light to enter the camera sensor. Exposure times range from 10 to 30 seconds. Longer exposures gather more light from dim night skies. The “500 rule” helps determine maximum exposure time. It prevents unwanted star trails in images.
ISO settings between 1600 and 3200 are common for astrophotography. Higher ISOs increase light sensitivity but introduce noise. Daylight white balance (5600K) renders natural colors of night skies. RAW format preserves maximum image data for post-processing flexibility. Long exposure noise reduction reduces thermal noise in images. It improves overall image quality.
Manual focus set to infinity ensures sharp stars. Wide-angle lenses in the 14-24mm range work best for night sky photos. They capture vast expanses of the night sky. Image stabilization should be disabled when using a tripod. It prevents unwanted vibrations during long exposures. Exposure compensation of +1 or +2 stops accounts for night sky brightness. It prevents underexposure of stars and celestial objects.
What exposure time to use for astrophotography?
Milky Way photography requires slower shutter speeds of 20-30 seconds. Longer exposures allow more light to enter the camera. Photographers experiment with different exposure times to find optimal combinations. Multiple exposures are taken for image stacking. Exposure settings depend on ISO (1600-3200) and aperture (around f/2.8) for best results.
Medium exposures range from 10 to 60 seconds. A 16-second exposure is typical when using a 16mm lens on a full-frame camera. The standard exposure time for Milky Way photography is 30 seconds. Long exposures of 5 minutes are common for hour-long imaging sessions.
Very long exposures exceed 10 minutes. Faint galaxies with advanced equipment require 20-minute exposures. Ultra-deep field imaging from dark sites uses 45-minute exposures. Specialized exposures include 500 seconds for deep sky objects with tracking mounts. Faint nebulae photography with cooled CCD cameras needs 1000-second exposures.
Astrophotographers use the “500 rule” to calculate maximum exposure times before star trailing occurs. Wide lenses allow 20-30 second exposures without star trails. Very wide lenses permit exposures up to 1 minute. Longer exposure times enable lower ISO settings, resulting in less image noise.
Stacking multiple long exposures reduces noise in astrophotography images. Deep sky object photography uses 2-5 minute exposures with tracking mounts. Astrophotographers stack shorter 1-3 minute sub-exposures to avoid noise and tracking errors. Focal length, aperture, ISO, desired target detail, and tracking accuracy influence ideal exposure length.
What is the best ISO for astrophotography?
ISO settings for astrophotography range from 1600 to 6400. Lower ISOs of 1600 produce cleaner images. Higher ISOs of 6400 introduce more noise. Modern DSLR cameras perform well at 800 to 1600 ISO. Best ISO depends on specific camera and shooting conditions. Photographers should test different ISOs to find optimal settings for their equipment.
ISO 6400 allows shorter shutter speeds and reduces star trailing in astrophotography. Cameras with excellent low-light performance utilize ISO 6400 to capture extremely faint objects like distant stars. ISO 200 prevents overexposure in very bright sky conditions for astrophotography. ISO 3200 increases camera sensitivity for extremely faint objects like distant stars.
Photographers use ISO 1200 for initial test shots to gauge camera performance. Long-exposure shots of the moon and stars benefit from ISO 800 for detailed images. ISO gives camera sensors increased sensitivity to light for better low-light performance. ISO is a measure of camera sensitivity to light in astrophotography. ISO levels range from 100 to 51200 or more, depending on camera models.
ISO ranging is critical for capturing high-quality images of stellar objects. Astrophotographers adjust ISO settings based on camera type, sensor, and shooting conditions. ISO setting is a critical component of the exposure triangle in astrophotography. Photographers experiment with different ISO values to find optimal settings in astrophotography.
What white balance for astrophotography?
Astrophotographers use 3200-4000K white balance for night photos. 3200-4000K range captures natural colors of the night sky. Low-light environments benefit from this setting. 3200-4000K white balance reduces noise and preserves subtle colors of stars and celestial objects. Daylight white balance (5500-6500K) is avoided for astro photography. Daylight settings introduce unwanted color casts in night photos.
Specific white balance settings produce distinct effects in astrophotography. 3000K serves as the tungsten setting to neutralize light pollution, useful in urban environments. 3900K enhances delicate colors in the night sky, bringing out subtle hues in nebulae and galaxies. 6500K faithfully reproduces star colors, ideal for capturing the true essence of stellar objects. 5200K represents the daylight setting, which is too warm for night sky photography and should be avoided.
White balance cards enable photographers to set custom white balance in-camera. Custom white balance settings accurately reflect the colors of the night sky scene. Shooting in RAW format captures maximum image data, allowing for precise white balance adjustments during post-processing.
What is the best f stop for astrophotography?
Lower f-stops are best for astrophotography. F/2.8 or wider apertures allow maximum light capture in dark nighttime skies. Wider apertures enable efficient light gathering and star separation. Specific settings and equipment influence optimal f-stop choice. F/4 or f/5.6 can be used when wanting more sky in focus.
F/1.4 is ideal for capturing faint stars and details in very dark skies. F/1.8 allows maximum light to enter the camera, excellent for capturing faint celestial objects. F/2 offers the best compromise between light gathering and sharpness for astrophotography. F/3.5 represents the typical maximum aperture for kit lenses used in astrophotography. F/4 is the minimum acceptable aperture for basic night sky shots with limited camera capabilities.
F/5.6 helps reduce light entering the camera in bright moonlit conditions. F/8 provides a good balance between light gathering and sharpness for deep sky objects with long exposures. F/12.4 is the optimal aperture for micro four thirds cameras in astrophotography. F/16 provides extreme depth of field for landscape astrophotography, ensuring both foreground and celestial objects are in focus.